1. HTTP헤더(Header)
- 2022.06.08 - [Network] - 네트워크 - HTTP 에 작성된 내용을 참조해 본다
- General headers
- 메시지 전체에 적용되는 헤더이며, body를 통해 전송되는 데이터와는 관련이 없는 헤더이다 - Response headers
- 위치 또는 서버 자체에 대한 정보(이름, 버전 등)와 같이 응답에 대한 부가적인 정보를 갖는 헤더이다
- Vary, Accept-Ranges와 같이 상태 줄에 넣기에는 공간이 부족했던 추가 정보를 제공한다 - Representation headers
- Entity headers라고 부르기도 한다
- body에 담긴 리소스의 정보(콘텐츠 길이, MIME 타입 등)를 포함하는 헤더이다
2. Spring MVC에서 HTTP Header의 사용
1) 클라이언트와 서버 관점에서의 대표적인 HTTP 헤더
- 클라이언트와 서버의 관점에서 내부적으로 가장 많이 사용되는 헤더 정보로 ‘Content-Type’이 있다
- 클라이언트와 서버가 주고 받는 HTTP 메시지 body의 데이터 형식을 알려준다
- 클라이언트와 서버는 Content-Type의 데이터 형식에 맞는 데이터들을 주고 받는다 - 샘플로 작성하고 있는 커피주문 애플리케이션의 Content-Type은 ‘application/json’이다
- Spring MVC - API 계층 - Controller (MVC 개요/핸들러 메서드) 에서는 prosuce 값으로 사용했지만, Spring MVC - API 계층 -Controller (ResponseEntity 적용) 에서 Map 객체를 사용하면서 Content-Type을 삭제했다
2) 대표적인 HTTP 헤더 예시
- 개발자가 직접 코드 레벨에서 HTTP 헤더를 컨트롤 해야될 경우 사용하는 대표적인 HTTP 헤더이다
- Authorization 헤더
- 클라이언트가 적절한 자격 증명을 가지고 있는지를 확인하기 위한 정보이다
- REST API 기반 애플리케이션의 경우 클라이언트와 서버 간의 로그인(사용자 ID/비밀번호) 인증(Authenticatioin)에 통과한 클라이언트들은 ‘Authorization’ 헤더 정보를 기준으로 인증에 통과한 클라이언트가 맞는지 확인하는 인가 절차를 거친다 - User-Agent 헤더
- 애플리케이션을 구현 과정에서 여러가지 유형의 클라이언트가 하나의 서버 애플리케이션에 요청을 전송하는 경우가 많다
- 사용자에 따라 데스크탑이나 노트북의 웹 브라우저를 사용하거나 스마트폰, 태블릿 등 모바일에서 서버에 요청을 보낸다
- 보내오는 요청의 클라이언트를 구분해서 응답 데이터를 다르게 보내줘야 되는 경우가 있다
- 모바일, 데스크탑, 노트북의 화면 크기에 따라 더 많은 정보를 보여주기 위해 각각 데이터의 종류와 크기가 다를 수 있다
- User-Agent 헤더 정보를 이용해서 클라이언트의 요청 브라우져를 구분해서 처리할 수 있다
3. 샘플 어플리케이션에 HTTP Header 적용
1) @RequestHeader 로 개별 헤더 정보 받기
- CoffeeController에 적용하여 실행한다
package com.dreamfactory.exam_controller.coffee;

import org.springframework.http.HttpStatus;
import org.springframework.http.MediaType;
import org.springframework.http.ResponseEntity;
import org.springframework.web.bind.annotation.*;

import java.lang.reflect.Member;
import java.sql.SQLOutput;
import java.util.HashMap;
import java.util.Map;


@RestController
@RequestMapping(value="v1/coffees"/*, produces = MediaType.APPLICATION_JSON_VALUE*/)
//v1은 버젼을 의미한다. coffees는 데이터 post, get 의 조회 위치를 의미한다

public class CoffeeController {
    @PostMapping

    //postCoffee() 메서드는 커피 정보를 등록해 준다
    public /*String*/ResponseEntity postCoffee(//@RequestParam("coffee")String coffee,
                                               @RequestHeader("user-agent")String userAgent,
                                                 @RequestParam("coffeeId")String coffeeId,
                                                 @RequestParam("korName")String korName,
                                                 @RequestParam("engName")String engName,
                                                 @RequestParam("price")int price) {
//        System.out.println("# coffee:" + coffee);
//        System.out.println("# coffeeId:" + coffeeId);
//        System.out.println("# korName:" + korName);
//        System.out.println("# engName:" + engName);
//        System.out.println("# price:" + price);

        //@RequestHeader 로 개별 정보 받아오기
        System.out.println("user-agent: " + userAgent);
        return new ResponseEntity<>(new Coffee(korName, engName, price),
        HttpStatus.CREATED);

        //Map객체로 변경
//            Map<String, String> map = new HashMap<>();
//            map.put("coffee", coffee);
//            map.put("coffeeId", coffeeId);
//            map.put("korName", korName);
//            map.put("engName", engName);
//            map.put("price", String.valueOf(price));
//
//            //return 값을 ResponseEntity로 변경
//        return new ResponseEntity<>(map, HttpStatus.CREATED);

//        String reponse =
//                "{\"" +
//                    "coffee\":\""+coffee+"\"," +
//                    "\"coffeeId\":\""+coffeeId+"\"," +
//                    "\"korName\":\""+korName+"\"," +
//                    "\"engName\":\""+engName+"\"," +
//                    "\"price\":\""+price+
//                "\"}";
//        return reponse;
    }

    @GetMapping("/{coffee-id}")

    //getCoffee() 메서드는 커피 정보을 클라이언트에게 제공하는 핸들러 메서드이다
    public /*String*/ResponseEntity getCoffee(@PathVariable("coffee-id")long coffeeId) {
        System.out.println("# coffeeId: " + coffeeId);
        return new ResponseEntity<>(HttpStatus.OK);
        }

    @GetMapping //별도의 URI를 지정해주지 않았기 때문에 클래스 레벨의 URI(“/v1/coffees”)에 매핑된다

    //getCoffees() 메서드는 커피 목록을 클라이언트에게 제공하는 핸들러 메서드이다
    public /*String*/ResponseEntity getCoffees() {
        System.out.println("# get Coffees");
        return new ResponseEntity<>(HttpStatus.OK);
    }
}- 실행하면 error가 발생한다
- new Coffee에 대한 신규 class를 생성하여 문제를 해결한다
package com.dreamfactory.exam_controller.coffee;

public class Coffee {
    public Coffee(String korName, String engName, int price) {
    }
}
2) @RequestHeader 로 전체 헤더 정보 받기
- MemberController에 적용하여 실행한다
package com.dreamfactory.exam_controller.member;

import ch.qos.logback.classic.util.LogbackMDCAdapter;
import org.springframework.http.HttpStatus;
import org.springframework.http.MediaType;
import org.springframework.http.ResponseEntity;
import org.springframework.web.bind.annotation.*;

import java.sql.SQLOutput;

import java.util.HashMap;
import java.util.Map;

@RestController

@RequestMapping("v1/members"/*,produce=MediaType.APPLICATION_JSON_VALUE*/)

public class MemberController {
    @PostMapping

    public /*String*/ResponseEntity postMember(@RequestHeader Map<String, String> headers,
                                               @RequestParam("email")String email,
                                               @RequestParam("name")String name,
                                               @RequestParam("phone")String phone) {

//        System.out.println("# email: " + email);
//        System.out.println("# name: " + name);
//        System.out.println("# phone: " + phone);

//        JSON문자열 응답 타입을 수작업 코드에서 Map객체로 변경->produce애트리뷰트를 삭제할 수 있다
            //MAp 객체를 리턴하면 내부적으로 응답 데이터를 JSON데이터로 자동 변환해야 한다고 인식한다
//            Map<String, String> map = new HashMap<>();
//            map.put("email", email);
//            map.put("name", name);
//            map.put("phone", phone);

        //@RequestHeader Map을 사용하여 전체 헤더 정보를 받아 온다
        for (Map.Entry<String, String> entry : headers.entrySet()){
            System.out.println("key: " + entry.getKey() +
                    ", value: " + entry.getValue());
        }
            //리턴 값을 변경된 ResponseEntity로 대체
            //ResponseEntity 객체를 생성하고 생성자 파라미터로 map과 HttpStatus.CREATED를 반환한다
            //HttpStatus.CREATED 는 201, created를 의미한다
//            return new ResponseEntity<>(map, HttpStatus.CREATED);

        //@RequestHeader Map 을 사용함으로 리턴 값의 코드가 변경된다
        return new ResponseEntity<>(new Member(email, name, phone), HttpStatus.CREATED);

//        String reponse =
//                "{\"" +
//                    "email\":\""+email+"\"," +
//                    "\"name\":\""+name+"\",\"" +
//                    "phone\":\"" + phone+
//                "\"}";
//        return reponse;
    }

    @GetMapping("/{member-id}")

    public /*String*/ResponseEntity getMember(@PathVariable("member-id")long memberId) {

        System.out.println("# memberId: " + memberId);
        //리턴 값을 변경된 ResponseEntity로 대체
        //HttpStatus.OK 는 200, OK를 의미한다
        return new ResponseEntity<>(HttpStatus.OK);
        //not implementation
//        return null;
    }

    @GetMapping //별도의 URI를 지정해주지 않았기 때문에 클래스 레벨의 URI(“/v1/members”)에 매핑된다

    //getMembers() 메서드는 회원 목록을 클라이언트에게 제공하는 핸들러 메서드이다
    public /*String*/ResponseEntity getMembers() {
        System.out.println("# get Members");
        //리턴 값을 변경된 ResponseEntity로 대체
        //HttpStatus.OK 는 200, OK를 의미한다
        return new ResponseEntity<>(HttpStatus.OK);
        //not implementation
//        return null;
    }
}- 위의 코드를 실행하면 error가 발생한다
- Member class를 생성하라는 메시지가 확인된다
- new Member에 대한 신규 class를 생성해 주면 해결된다
package com.dreamfactory.exam_controller.member;

public class  Member {
    public Member(String email, String name, String phone) {
    }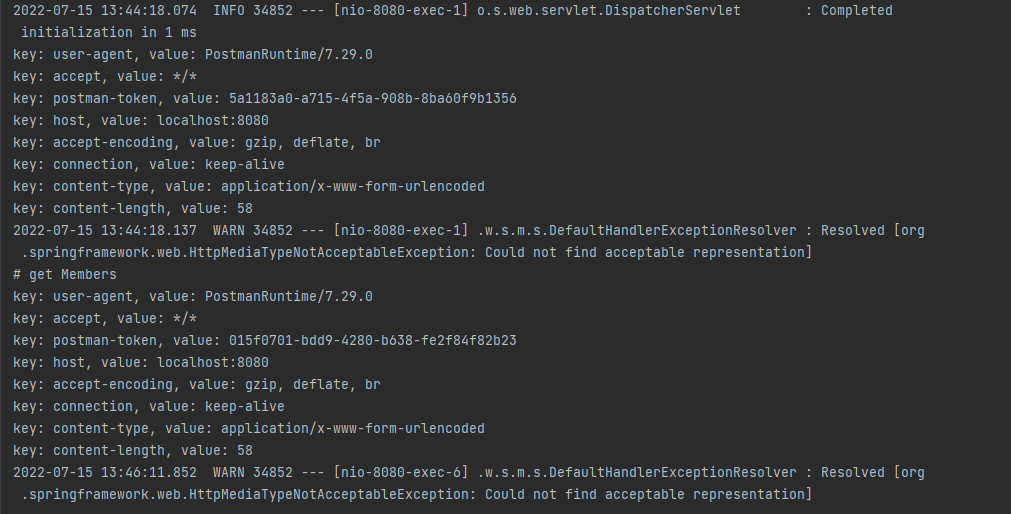
}- postman으로 get/post를 실행하면 아래와 같은 CLI 메시지가 출력된다
3) HttpServletRequest 객체로 헤더 정보 얻기
- HttpServletRequest 객체를 이용하면 Request 헤더 정보에 다양한 방법으로 접근이 가능하다
- HttpServletRequest는 다양한 API를 지원하지만 특정 헤더 정보에 접근하고자 한다면 @RequestHeader 가 더 용이하다
- orderController에 HttpservletRequest 적용하기
package com.dreamfactory.exam_controller.order;

import org.springframework.http.HttpStatus;
import org.springframework.http.MediaType;
import org.springframework.http.ResponseEntity;
import org.springframework.web.bind.annotation.*;

import javax.servlet.http.HttpServletRequest;
import java.util.HashMap;
import java.util.Map;

@RestController
@RequestMapping(value="v1/orders"/*, produces = MediaType.APPLICATION_JSON_VALUE*/)

public class OrderController {
    @PostMapping

    //postOrder() 메서드는 커피 주문 정보를 등록한다
    public /*String*/ResponseEntity postOrder(HttpServletRequest httpServletRequest,
                                              @RequestParam("memberId") String memberId,
                                              @RequestParam("coffeeId") String coffeeId) {

////        Map<String, String> map = new HashMap<>();
////        map.put("memberId", memberId);
////        map.put("coffeeId", coffeeId);
//
//        return new ResponseEntity(map, HttpStatus.CREATED);

        System.out.println("user-agent: " + httpServletRequest.getHeader("user-agent"));
        return new ResponseEntity<>(new Order(memberId, coffeeId),
                HttpStatus.CREATED);
//        System.out.println("# memberId:" + memberId);
//        System.out.println("# coffeeId:" + coffeeId);
//
//        String reponse =
//                "{\"" +
//                        "memberId\":\"" + memberId + "\"," +
//                        "\"coffeeId\":\"" + coffeeId +
//                        "\"}";
//        return reponse;
    }

    @GetMapping("/{order-id}")
    public /*String*/ResponseEntity getOrder(@PathVariable("order-id") long orderId) {
        System.out.println("# orderId: " + orderId);
        return new ResponseEntity(HttpStatus.OK);
    }

    @GetMapping //별도의 URI를 지정해주지 않았기 때문에 클래스 레벨의 URI(“/v1/orders”)에 매핑된다

    //getOrders() 메서드는 주문 목록을 클라이언트에게 제공하는 핸들러 메서드이다
    public /*String*/ResponseEntity getOrders() {
        System.out.println("# get Orders");
        return new ResponseEntity(HttpStatus.OK);
    }
}- 실행하면 error가 발생한다
- new Order에 대한 신규 class를 생성하면 해결된다
package com.dreamfactory.exam_controller.order;

public class Order {
    public  Order (String memberId, String CoffeeId){

    };
}- postman으로 post/get를 실행하면 아래와 같이 CLI가 출력된다

※ 참조 링크
▶ HTTP Header : https://developer.mozilla.org/ko/docs/Web/HTTP/Headers
HTTP 헤더 - HTTP | MDN
HTTP 헤더는 클라이언트와 서버가 요청 또는 응답으로 부가적인 정보를 전송할 수 있도록 해줍니다. HTTP 헤더는 대소문자를 구분하지 않는 이름과 콜론 ':' 다음에 오는 값(줄 바꿈 없이)으로 이루
developer.mozilla.org
▶ HttpServletRequest : https://docs.oracle.com/javaee/7/api/index.html?javax/servlet/http/HttpServletRequest.html
Java(TM) EE 7 Specification APIs
docs.oracle.com
https://docs.oracle.com/javaee/7/api/index.html?javax/servlet/http/HttpServletResponse.html
Java(TM) EE 7 Specification APIs
docs.oracle.com
▶ User Agent의 유형 : https://gist.github.com/pzb/b4b6f57144aea7827ae4
user-agents.txt
GitHub Gist: instantly share code, notes, and snippets.
gist.github.com
https://developer.mozilla.org/en-US/docs/Web/HTTP/Headers/User-Agent
User-Agent - HTTP | MDN
The User-Agent request header is a characteristic string that lets servers and network peers identify the application, operating system, vendor, and/or version of the requesting user agent.
developer.mozilla.org
▶ 백엔드 서비스에 커스텀 헤더 만들기 : https://cloud.google.com/load-balancing/docs/https/custom-headers?hl=ko
백엔드 서비스에 커스텀 헤더 만들기 | 부하 분산 | Google Cloud
전역 외부 HTTP(S) 부하 분산기(기본)에서 사용하는 백엔드 서비스의 커스텀 헤더를 구성합니다.
cloud.google.com
▶ HTTP 헤더 및 Application Load Balancer : https://docs.aws.amazon.com/ko_kr/elasticloadbalancing/latest/application/x-forwarded-headers.html
HTTP 헤더 및 Application Load Balancer - Elastic Load Balancing
HTTP 요청 및 HTTP 응답은 헤더 필드를 사용하여 HTTP 메시지에 대한 정보를 전송합니다. HTTP 헤더가 자동으로 추가됩니다. 헤더 필드는 콜론으로 구분된 이름-값 페어이며 CR(캐리지 리턴) 및 LF(줄
docs.aws.amazon.com
'Spring MVC' 카테고리의 다른 글
| Spring MVC(6) - API 계층 - DTO(Data Transfer Object) (1) | 2022.09.22 |
|---|---|
| Spring MVC(5) - API 계층 - Rest Client(RestTemplate class) (0) | 2022.09.21 |
| Spring MVC(3) - API 계층 -Controller (ResponseEntity 적용) (0) | 2022.09.21 |
| Spring MVC(2) - API 계층 - Controller (MVC 개요/핸들러 메서드) (0) | 2022.09.21 |
| Spring MVC(1) - 개요 (0) | 2022.09.21 |